Using BBEdit for Editing Apache Configuration Files

Off late, I’ve been working a lot with Apache configration files. And since I use BBEdit for most of my text file editing, I invariably use BBEdit for editing Apache configuration files. My workflow for working with these files is now quite settled. I thought I’d share it here.

Syntax Color Coding

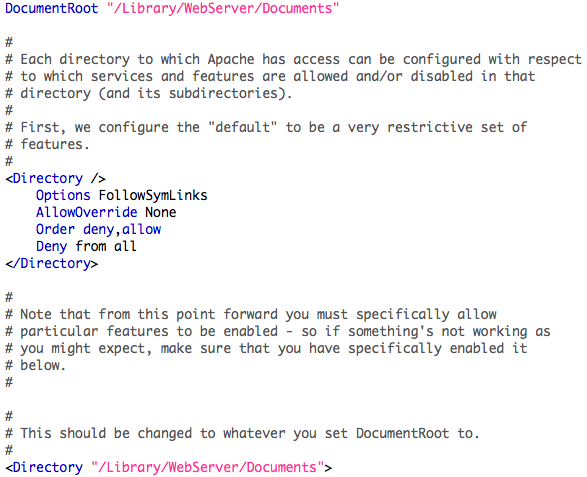
BBEdit has very nice third-party language module for Apache Configuration files. The module automagically provides syntax coloring for all the Apache keywords, making it really easy to read configuration files. If you have ever had to work with Apache configuration files, you will see the utility in something like this. Obviously if you make any error in spelling out a directive or any other keyword, it does not get color-coded, so one ends up making fewer errors.

Apache Configuration Files Color Coding

Editing All Files at One Go

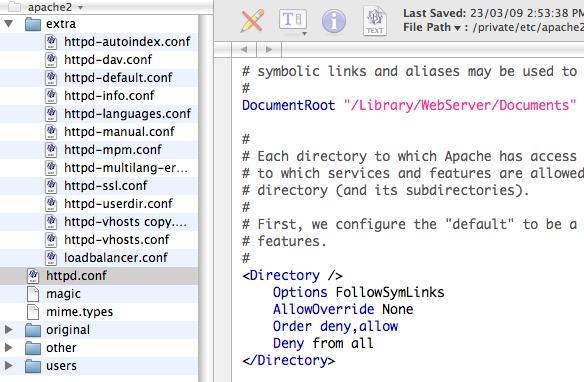
BBEdit has a very feature where one can open up a whole folder for editing. All files in the folder being edited become available on one side of the screen.

Apache File View

This comes in quite handy if you have a lot of include files in your main Apache conf. I have my enviornment setup so that I issue the following on Terminal and BBEdit loads up the folder view for Apache configuration files:

bbedit /private/etc/apache2

Testing Configuration

After making any change to configuration files, I normally test if the changes are ok or not. I’ve created a simple shell script that does the needful.

#!/bin/sh
sudo apachectl -t

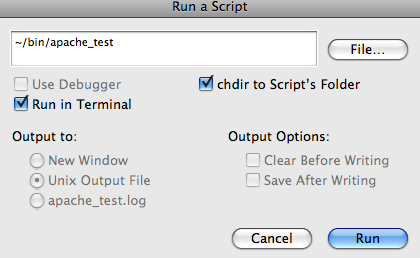
Using BBEdit you can run this script from within BBEdit, without having to open Terminal. You need to click on the top menu option which looks like #! to bring up the menu to run the script.

Restarting Apache

If the test is ok, you can restart Apache. I have another simply shell script that does the needful:

#!/bin/sh
sudo apachectl restart

Again, I run it using the BBEdit option to run scripts in Terminal.

All in all, with the plugin and these simply scripts, my Apache webserver configuration tasks have become much simpler and more streamlined.
Monitoring a JBoss Instance Running ColdFusion and Railo with JConsole

Today I needed to use JConsole to connect up to a JBoss instance running ColdFusion and Railo. I wanted to see thread usage etc. when starting the application I’m working on.

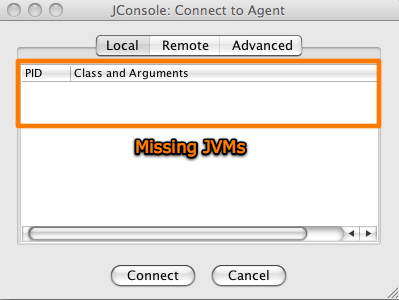
In the past when I’ve used JConsole, it used to automatically detect the running JVMs and show them in the startup dialog box. However, today I wasn’t seeing the running JVMs.

I could connect using the Advanced option in JConsole and by putting in the JMX Connector URI. But connecting like that means that JConsole does not provide information on threads/memory etc. — stuff I wanted to see.

After a bit of digging around I found that you need to pass the following arguments to the JVM that you want to monitor in JConsole:

-Dcom.sun.management.jmxremote
-Dcom.sun.management.jmxremote.authenticate=false

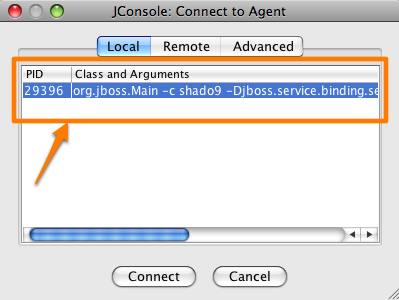
Once I added these JVM arguments and restart my JBoss instance, JConsole automatically detected running JVMs.

Normally JConsole should automatically detect running JVMs. But I believe this has to do with the fact that I was using Java version 1.5.0_16. If you are using Java 6, you shouldn’t need to do this.

Setting JVM options on JBoss for ColdFusion 8 debugging

Today I wanted to give ColdFusion 8 debugging a try.

So, I started followed the instructions on how to setup the enviornment for debugging. After installing ColdFusion 8 extensions for Eclipse, I went to enable debugger in ColdFusion Administrator. The CF administrator instructs that:

You must specify this debugger port in the JVM settings of your application server, for example: -Xdebug -Xrunjdwp:transport=dt_socket,server=y,suspend=n,address=5005, and restart the server.

If I was using JRun, I know that these options can be added in the jvm.config file.

But as I use JBoss, it took me little bit to figure out where I need to make these changes.

JBoss does not have jvm.config file. You have specify the JVM settings in $JBOSS_HOME/bin/run.conf

You need to look for the portion where JAVA_OPTS variable is setup. Add the following to the existing JAVA_OPTS

-Xdebug
-Xrunjdwp:transport=dt_socket,server=y,suspend=n,address=5005

Restart the server and these settings become active.

For complete instructions on how to setup ColdFusion 8 Debugger visit this article on Adobe DevNet: Using the ColdFusion 8 step-through debugger for Eclipse

Once it gets going, it is quite useful. Reminds me of the good old days when CF debugging used to be a part of CF Studio.

PS: There is this interesting article on 6 Common Errors in Setting Java Heap Size. While talking about the common errors, it also indicates how to setup Java options/JVM arguments in a whole range of environments.

JSP Issues with Railo

In JBoss, if you deploy Railo jars in server/servername/lib folder (basically if you do a global Railo install), then you would have have noticed that JSP pages stop working. It appears that a global install of Railo seems to overwrite the servlet that handles JSP pages. As a result, each time you try and access JSP pages in any other application that is running on the same JBoss instance, you get a message like:

HTTP Status 405 – HTTP method GET is not supported by this URL type
Status report
message HTTP method GET is not supported by this URL
description The specified HTTP method is not allowed for the requested
resource (HTTP method GET is not supported by this URL).

And this is quite irritating as other applications like jmx-console (which rely on JSP pages) stop working.

The way to fix this is to not do a global install of Railo jars. Normally there is no compelling reason to do such an install.

So basically deploy Railo as a EAR/WAR application, with the WEB-INF/lib folder containing all the Railo jar files (instead of server/servername/lib folder), and follow instructions on my earlier blog entry on Fixing Classloader Conflicts in Railo on JBoss.

Since Railo libs are not installed for all apps on the server instance, JSPs start working, and chance of other such conflicts are reduced.

Fixing Classloader Conflicts in Railo on JBoss

If you’ve been working with Railo on JBoss, I’m sure you’d have run into an issue where the class loader throws error when the JBoss instance is started. These errors are caused due to conflicts between classes that are being loaded up by different applications in the JBoss server instance.

Some have suggested removing a few jar files from the Railo lib folder to get around this issue. Some others have suggested putting all the Railo jar files in the server/servername/lib folder instead of the usual server/servername/railo.war/lib folder. While both approaches work in that Railo starts up without any errors, but both are a ways to get around the problem rather than actually addressing it.

The correct way to fix this issue is to make JBoss isloate classes loaded for different applications, thereby removing the possibiiity of conflicts. On JBoss 5 you can do this if you add a file in WEB-INF/jboss-classloading.xml that contains:

<?xml version="1.0" encoding="UTF-8"?>
<classloading xmlns="urn:jboss:classloading:1.0"
name="mywar.war"
domain="DefaultDomain"
export-all="NON_EMPTY"
             import-all="true">
</classloading>

This defines how an application’s classloader is setup and how the classes loaded for an application are share with other applications in the JBoss instance.

After you add this file into railo.war/WEB-INF, restart the server with all the jars that ship with Railo, and all classes should load up without any issue.